Tuesday, March 15, 2011

Kimchi Party!


Dear Michelle-


Oh man that pizza looks good! I had been hoping you were going to follow up "how to make pizza dough" with some actual pizza. I'll have to try that recipe sometime, but I have to admit that it's hard to give up our shortcut--pizza dough bought from Carmines, the pizza place on our block. In the pros and cons of New York City list that I'm sure every non-native New Yorker has, general proximity to pizza joints is definitely a pro. 


Another wonderful thing about New York is the constant movement of the city--people connect, create, build, and come up with things like the Brooklyn Brainery, a space dedicated to hosting cheap classes ($5-$25) in which you can learn about a variety of subjects. It's pretty awesome. Jeff had seen something online about a kimchi party they were having on a Sunday in January and thought I might be interested, which, duh, of course I was. 


Here's the gist of kimchi: in its purest form, it is a fermented cabbage, much like sauerkraut. However, it can be made with other vegetables, turnips being commonly used, and is generally quite spicy. The kimchi we made used cabbage, shredded carrot and daikon radish, a sweet rice porridge, garlic, ginger, scallion, fish sauce, flaked pepper, sugar and salt. The second kimchi that I made had celery instead of cabbage, but everything else was the same. In case you think I'm greedy for making two, I'll add that I did share my celery (and was pleased to see that it was almost gone by the time I left!). Once you're done mixing your kimchi, you can eat it immediately or let it sit out at room temperature for a few days to ferment. This makes it bubbly and pungent. I never took a photo of my finished product, sorry. It was good, though. I'll certainly make it again! We love Kimchi, and it will be nice to experiment with different vegetables.


Amy and Mary and I met at the G-train, and somehow managed to turn a two-minute walk from the subway into fifteen. I figured, no problem, as we'd planned to arrive at the beginning of the five-hour window of the come-when-you-will workshop. It was packed. I wish I'd taken a photo of the space, and of the crowd, but it was all I could do to follow my friends around taking photos and then dart in line to make my own kimchi.


Jeff and I had tried a kimchi plate at Mrs. Kim's in Greenpoint a while ago, on which the celery kimchi was both unexpected and unexpectedly good. I brought a bunch of celery with me to the party, hoping to make a jar with that and one with cabbage. The people running everything were really nice about it, pointing me to a sink and a knife and cutting board to prep, along with exclaiming what a good idea the celery was. 


I chopped while the short presentation went on, and then watched the free-for-all begin. I  exaggerate a bit--there was a line--but it was difficult to squeeze in to take photos. The best part was at the end of the ingredients line, where people were mixing and packing their creations everywhere. They were taking turns holding the bowls for each other, mixing on the floor, really anywhere they could. There was kimchi everywhere! I headed over to a table that most people had overlooked somehow. 


Despite how hectic everything was, everyone was good-humored. I guess a $5 make-your-own kimchi (ingredients-included) party makes people happy. It certainly was a good deal, especially for the people who brought GIANT containers and filled them up with the spicy fragrant cabbage mixture. 


The recipe below is only a guideline, as the amounts of various ingredients differs greatly from recipe to recipe. I let my kimchi sit out for three days before moving it to the fridge, though next time I might only do two, as it got a little soft for my taste. I also might go heavier on the ginger, and add more scallions. If you use celery, don't forget to de-string the stalks! 


There are a variety of things you can do with Kimchi: I like it tossed with with miso butter and soba noodles, in stir-fry or fried rice, or blended into a sauce for vegetables or tofu. It is commonly eaten as one of several small side dishes that are served with Korean meals, or made into kimchi pancakes or kimchi stew. I love that something that seems so specific--spicy fermented cabbage--can be used in so many dishes. 


This workshop happened just a couple of days before the snowstorm here in January, so here is a link to some photos of that. 


 Kimchi, Brooklyn Brainery style

This recipe is what the Brooklyn Brainery had up on the wall during the party, and also what they sent out via email afterwards. It is verbatim. 

Use a little more garlic or a little less ginger, do whatever you think you’ll like! 

• 1 tsp garlic 
• 1 tsp ginger 
• ¼ cup shredded radish 
• 2 tbl shredded carrot 
• pinch of green onions (3 tbl, but it’s tough to measure) 
• 1 tsp sugar (or ¼ c rice porridge) 
• 1 tbl onion paste 
• 1 tbl fish sauce 
• 1-3 tbl red pepper flakes 
• 1 ½ cups cabbage 

If you’d prefer to make cucumber kimchi, follow the exact same instructions, just stuff the ingredients into a cucumber at the end! 
And radish kimchi? Just mix in the cubed radishes! 


Kimchi Technique 
With any kimchi recipe, there are three steps. 


1: Brining 
After you cut up your cabbage, you need to salt it to draw out the water and do some magic on the texture and flavor. 
Method 1: Mix 1 cup of salt into the cut-up cabbage for every 10 pounds of cabbage. Let sit for 1 ½ hours, mixing every half hour. 
Method 2: Mix 2 cups water with ½ cup salt for every pound of cabbage. Cut the cabbages into quarters, sprinkle salt on the stems, and submerge them in the salty water for 4-5 hours. 


2: Mixing 
Mix together everything except your cabbage. 
Tip: The more finely you mince your garlic and ginger, the better the end product will be. If you can get it paste-like with the held of a food processor you’re in good shape! 
Now mix it up with your cabbage. 


3: Fermenting 
While you can eat your kimchi right away, it doesn’t get awesome until it’s started to ferment. Fermentation happens when little friendly bacteria work their way through the sugars, turning them into acids and CO2.. This is what makes kimchi taste sour. 
How do you ferment? Just leave your kimchi alone and they’ll get started without you. It happens a lot more quickly on the countertop than in the fridge – I like to set my kimchi on a table in the kitchen for a couple days before I move it into the fridge. Don’t worry about it spoiling – the good bacteria have all sorts of methods they use to keep everything clean. If you notice a little white scum on top, scoop it off before you put it in the fridge. 
Once it’s been around for 3-4 weeks, it’s probably gotten to the point where it’s pretty sour and a good candidate for kimchi stew! 

Friday, March 4, 2011

Pizza Dough Part II: Mushroom and Garlic

Dear Devon,

Ever since I discovered how easy it is to make fresh pizza dough, I have made pizza for lunch and dinner several times. I am surprised that I never thought to try it before. How foolish of me, to have avoided yeast-based recipes simply for fear of pulling dense, unleavened bricks from the oven!

While the process of making dough is a constant, toppings offer a freedom of imagination almost unparalleled since the “recipe” for fried rice. Of course, there is the standard use of tomato sauce and cheese, but beyond that… the possibilities are endless. Rummaging through the fridge has produced a lengthy list of unusual, but delicious combinations. In a pinch, I have used smashed garlic and onions. It was all I had in the house. It was delicious, though gum was helpful after lunch. The roasted garlic gave the pizza a surprisingly strong smell and a hint of burnt sweetness. Why isn’t this a standard topping?


Picking my own toppings is definitely the best part of making pizza at home. I don’t limit myself to the ones that you can find in pizzeria display cases. I’ve found success with a variety of toppings both in combination and by themselves. Thinly sliced eggplant rounds, goat cheese, mushrooms, spring onions, rosemary, fresh tomato, and of course, garlic, just to name a few. But don’t let me inhibit your imagination!

P.S. You’ll notice that I’m using a paella pan as a pizza board. I like to think that living in Spain is taking my resourcefulness to new heights.


Mushroom and Garlic Pizza

Prepared pizza dough, enough for a 12 inch pizza
3 to 4 white button mushrooms, sliced paper thin
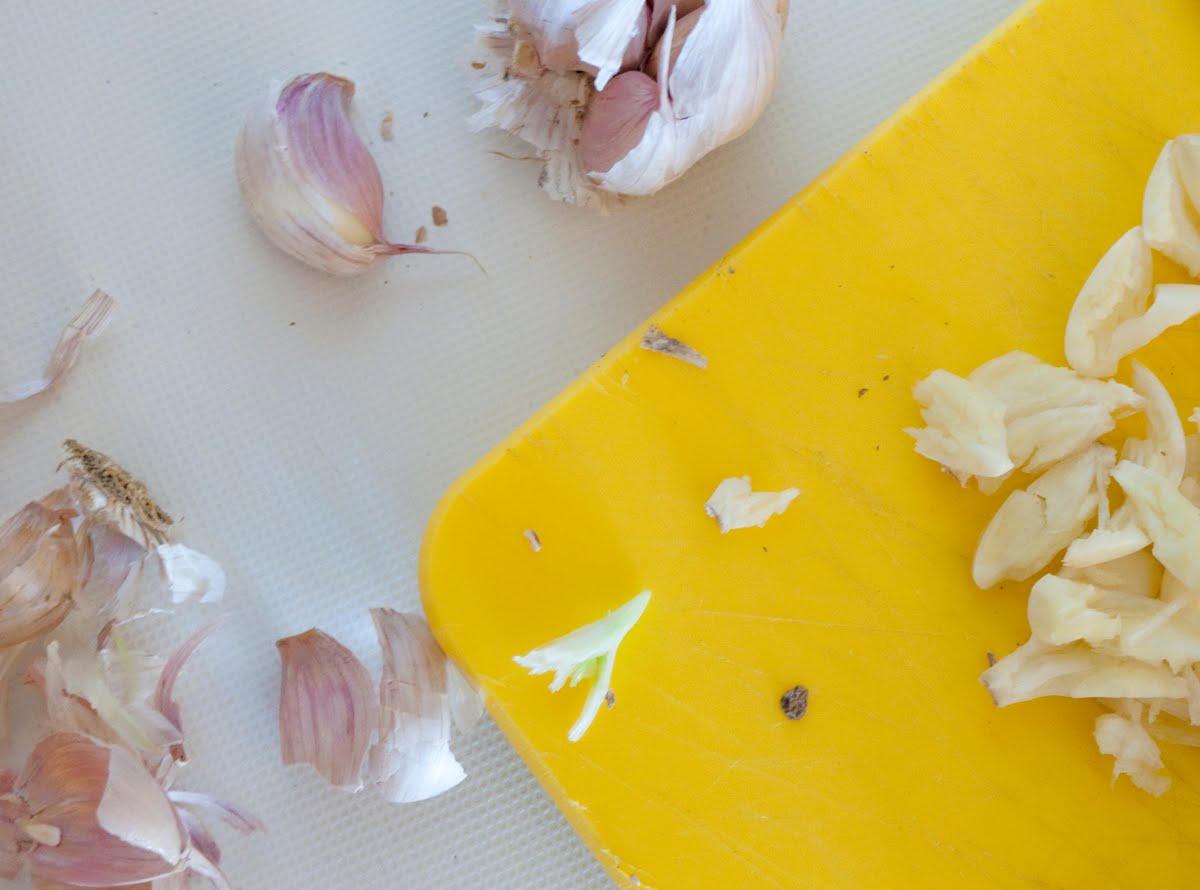
3 cloves of garlic, smashed
1 round of fresh mozzarella cheese, thinly sliced
¼ cup tomato puree
cornmeal for dusting
salt

Preheat oven to 450 degrees F. To get that crisp texture, make sure the oven is at temperature before putting the pizza in. Lightly sprinkle the pizza board or pan with a bit of cornmeal.

Lightly flour a work surface. Roll the dough roughly circular, adding additional flour as necessary. Carefully lift dough and place onto baking pan. Spread tomato sauce leaving a ½ inch crust. Top with cheese, mushrooms, and garlic.

Bake in hot oven for 15 minutes, until the cheese is melted and the crust is nicely browned. I like to turn on the broiler for about 2 minutes at the very end. I prefer my pizza slightly burned.

Thursday, March 3, 2011

Double Celery Soup


Dear Michelle-

I am so ready for Spring. We just got back from a trip to Oregon to visit my in-laws and meet our new niece, and though it was rainy, even a little snowy, Winter is on its way out there. Crocuses and periwinkle were blooming, and the daffodils were on the cusp. Portland was green and mossy, beautiful when the sun made a brief appearance.


 We had a great time. We played with the baby, watched cable on the huge TV, and took advantage of much lower food and movie costs. There's a great lunch spot in Salem, OR, that deserves a mention here called the Wild Pear; I've been there several times over the years and it never fails to please. My sister in law and I had a terrific lunch there followed by gelato (also very good), and then I went back for both with Jeff and his mother the next day! We also went to see both Somewhere and Black Swan. Somwhere was very much what you'd expect of a Sophia Coppola movie, but in a good way (with the exception of the ending- what? really?). It was beautiful, and more about mood than it was plot. Black Swan was fantastic. I've heard it called melodramatic, by more than one person, but it is after all a psychological thriller, and very, very intense. Go see it if you can!


When in Portland, we went out to karaoke with some friends, which was great fun. You know I rarely drink, but karaoke is not something best done sober, at least not for me. I tried it once, but I never will again! We went to Voicebox, and I tried several of the sakes there, but I was blown away by one of them, Hou Hou Shu Sparkling Sake, described as, "Heaven in a bottle." Damned right. That stuff was amazing- light, floral but not too sweet, with a hint of coconut. Unfortunately it was also not so cheap, but I split one with someone and made do with the Sake2me sparkling sake after that, which was perfectly good. Unfortunately, I can't say the same for my karaoke skills, but I do have a lot of enthusiasm.


So now we are back in Brooklyn, wishing for Spring, and having seriously overindulged while away. It was the perfect time to make a Patricia Wells recipe I had fond memories of, double celery soup. This is a very simple, restorative soup with few ingredients: celery root, celery stalks, leeks, stock, and salt. She suggests adding a bouquet garni, but I didn't want to spend money on fresh herbs and added some herbes de Provence instead.


The soup is intended to be served as diced vegetables in broth, but I've found I like it as well, if not better, pureed with a little butter added. I served it with buttered bread, and crutons would be good too. Added is a photo of Jeff post-dinner that fit the color scheme. Also, here are some photos of Portland.


 Double Celery Soup from Bistro Cooking by Patricia Wells pg 31, recipe is verbatim

1 medium celery root, (about 1 lb; 500 g), peeled and diced
10 celery ribs, cubed
3 leeks (about 9 ounces; 270 g), trimmed, well rinsed and cut into thin rounds
Bouquet garni: 1 large sprig of thyme, 3 imported bay leaves, several sprigs of parsley, tied with string
2 quarts (2 l) chicken stock, preferably homemade
Salt and freshly ground pepper
A handful of chopped fresh herbs for garnish: including chervil, chives, flat-leaf parsley

In  large saucepan, combine the celery root, celery, leeks, and bouquet garni. Add the stock, and season gently with salt and pepper. Bring to a simmer over medium-high heat. Simmer until the vegetables are soft, about 25 minutes. Adjust the seasonings. Pour into warmed shallow soup bowls. Sprinkle with the chopped herbs and serve immediately. Yield is 6 to 8 servings

Thursday, February 24, 2011

Hush Puppies, My Contribution to the Office Christmas Party Dinner


Dear Michelle-

My, you have been busy! And eating very well. I've been a very different sort of busy, filling in for a friend at work, and cleaning, cleaning, cleaning my apartment. Even the work I was doing was cleaning, albeit a digital archiving system! So this past month has been one big purge and organize for me, and I've come out of it feeling much calmer and far less cluttered. Do you ever find that sometimes you just can't do ANYTHING until you've cleaned the space around you?


I've been cooking, and I have several backed-up recipes to share with you, but first I'd like to share these hush puppies, and photos from the office Christmas party.


I don't work in a traditional office. In fact, I very rarely work in an office at all, but when I did it was Paul's. I did various things in his office, as well as assisted for him, before I "left" to retouch from home. I've always also worked for other people, but most of my work has and does come from Paul. The number of people in the office (where I still go when I need to drop off files) varies from 1-6 at any given time, depending on who is in, and including Paul and his wife, Ulla.


Every single one of the people that works there, and that I've known who worked there and then moved on, is awesome. Not, like, how my friends describe their "work friends" as nice people who break up the tedium of the day, but they don't want to hang out with outside of work; these are truly awesome, interesting people I'm proud to call my friends.


All of us do things on the side, mostly fine art, and all of us are supported and encouraged in these endeavors by Paul and Ulla. It's really more like a family or a social group that works together than it is an office, which makes it a very rewarding place to be. Everyone gets along, and even better actively enjoys each other.


So, we tend to have really awesome Christmas parties. Usually we go out to the Warchols' house in Pennsylvania, and we feast and they put us up in the B&B across the street for the evening, but this year a former employee who now shares office space with the PW group proposed she have the party in her apartment, and make gumbo.


Amy's apartment is terrific, a large space with high ceilings and a lot of light, beautifully decorated, plus it's only about a ten-minute walk from my place. Paul picked up some extra tables and we fit about 20 of us in there.


Amy made gumbo and rice, Ulla and Paul made various salads and vegetable dishes, their daughter Lucinda whipped up a beautiful pie, and I made hush puppies and sour cream ice cream.


A member of our party avoids gluten, so I looked online for a gluten-free hush puppy recipe, and found several. Here is the one I used, and I substituted rice four for the "gluten-free flour mix." They were SO GOOD. I made way too many, and they were all eaten; I ate so many "testers" while cooking that I ruined my appetite, which was a shame! So many times people tend to be scared off (maybe rightly so) by recipes that have substitutions as a result of dietary restrictions.


Well, these are the lightest, fluffiest hush puppies I've ever had, and I don't think I'll ever use another recipe. They are light as air on the inside, lightly flavored with onion, and crispy crunchy on the outside. With more forethought, I'd have served them with some honey or maple butter, but it's really not necessary.


  Hush Puppies

1 cup corn meal
1/2 c rice flour
3 t baking powder
1/2 t salt
1t sugar ( I think I may have foregone this)
2 eggs
1 cup buttermilk
1/8 t baking soda
1 cup chopped shallot or onion
oil for frying (I prefer peanut)

Mix dry ingredients except for baking soda together. Mix eggs and buttermilk in another small bowl, then mix in baking soda; add mixture to the dry ingredients. Mix in shallots. Drop large spoonfuls of batter into hot oil and fry until golden.


Tuesday, February 22, 2011

Pizza Dough

Dear Devon,

In recent weeks, my craving for a good slice of pizza has almost brought me to a standstill. I didn’t think I was the type who would miss a hamburger, everything bagels, and a crispy slice of New York pizza, but it turns out I am. My sister had asked me to post something on pizza. Renee is one of the few people in the entire world that I will indulge. Anyway, I wanted pizza.

My New York self six months ago must have anticipated that pizza would bring my daily routine to a halt, because I packed a photocopied pizza dough recipe from Cindy Mushet’s The Art and Soul of Baking. Although I had never tried this recipe, I have found success with many others from her book. Once I succeeded in converting English to metric, I was ready to start kneading pizza dough.
Mushet’s The Art and Soul of Baking is one of my all time favorites, but her dependence on the classic KitchenAid stand mixer disappoints me. I do not have the counter space, storage facilities, or the resources to call this irreplaceable tool my own. It would certainly be handy for making bread and whipping egg whites, but until I own that sprawling California kitchen, I’ll make do with good old arm strength.

After two anxiety attacks, I adapted the recipe to a non-mechanical process. A few practice rounds later, I streamlined the process, making fresh pizza dough a simple morning task.

Mushet’s recipe makes enough dough for 2 large pizzas. I highly recommend making the recipe in full. The dough is relatively easy to make and the results are fantastic. If you halve the recipe, which I did at first, you will regret it as soon as you finish that last bite. After dividing the dough into halves (or thirds, in fact), I make one pizza for the oven and wrap and seal the remaining dough in a ziplock bag destined for the freezer. Defrosting the dough is simple and takes only a few hours in the fridge. I also like to date whatever goes in the freezer. Sometimes, things go in and don’t come out. I don’t recommend eating that two-year-old lamb curry in the back corner of your freezer.

Fresh Pizza Dough
(adapted from Cindy Mushet, The Art and Soul of Baking, p. 77-78)
makes 3 pizzas

¼ cup warm water (110 to 115 degrees F)
2 ¼ tsp active dry yeast, or 1 ¾ tsp instant yeast
3/4 cup water
2 tbsp olive oil
3 ¼ cups bread flour or unbleached all-purpose flour
2 tsp salt


In a bowl, mix together yeast and warm water. Add a pinch of sugar and whisk until well blended. Wait five minutes until the mixture gets a bit frothy and milky. Add water and olive to the bowl, mixing to blend (as best you can). The mixture should smell like fresh yeast, sweet and pungent.

On a clean surface, dump out measured flour and salt. Loosely blend with your fingers. Pull the flour together into a roughly pyramidal mound. Make a large well in the center, pushing flour outwards to create a roughly 8-inch “bowl.”

Pour the yeast mixture into the center of the well. Using a fork, slowly incorporate the flour into the mixture, continuously whisking to get rid of any lumps. Continue adding flour with the fork, moving around the base of the flour mound. When the mixture becomes too difficult to mix with the fork, begin breaching the flour walls by adding flour from the top of the wall. Work quickly or the loose dough will run all over the board. Continue to add flour until a rough dough forms. It should be sticky, pungent, and roughly textured. Work into a lump and set in a bowl to rest for 20 minutes. Cover with a lint free cloth.

On a well floured surface, turn out dough. With floured hands, knead for 8 to 10 minutes. The dough should be smooth and elastic. Add more flour as needed. It is a fairly resilient dough. A touch more flour will not affect its final outcome. Set in a lightly oiled bowl to rise for 40 to 60 minutes. Cover with a lint free cloth.

At this point, the dough can be frozen or refrigerated for future use. If destined for the freezer, be sure to divide the dough into halves, wrap in plastic wrap and place into an airtight ziplock bag. Mushet says the dough will stay good up to one month in the freezer. I recently made an eggplant and olive pizza using the frozen dough. It turned out great, just plan a few hours for defrosting and you’re all set.

Monday, February 14, 2011

Blood Orange Olive Oil Cake

Dear Devon,

Last year on Valentine’s Day, slightly blue scones— made with blood oranges— appeared on your kitchen table. I thought I’d pick up where you left off. This morning, I threw together a blood orange and olive oil cake. Blood oranges are in season. And the fiery skinned fruits are all over the market stands.

These oranges were bursting with juice and color. The smell was completely intoxicating. I felt a bit wasteful using the juice to flavor my cake. It seemed much more appropriate to drink the sweet and slightly acidic juice. I called the still groggy eyed boy into the kitchen to share in the sweet flowery smell of freshly squeezed juice.

I have tried to keep kitchen equipment and utensils to the bare minimum. Not an easy task, given my love of smooth ceramic mixing bowls, enamel coated Dutch ovens, and silicon molds. I am now forced to be a bit more resourceful. This is how I ended up using my terracotta cazuela as a baking dish.

A traditional cooking vessel, the cazuela is used for just about everything: roasting, boiling water, stewing…the list continues. Baking a cake seemed a natural extension. The thick clay walls would act almost like an oven within the oven, insulating the cake nicely and providing even heat. I suspected that these same properties would result in a beautiful crunchy crust. (I was not disappointed).

In general, it is good practice to measure the capacity of the baking vessel before filling it with batter. I only wish I had thought to measure the capacity of my mixing bowl too! Half way through the recipe, I realized that it was not possible to mix the liquids and the flour in my medium sized bowl. A bit frantic, I had to press my aluminum pot into service.


Mixing the blood orange juice into the batter, I issued a silent prayer that my cake would not turn out that light blue color of your scones. I reread your post before starting for some advice. To try to avoid the blue effect, I mixed in tangy yogurt instead of lowfat milk. I hoped the acid from the yogurt would help balance the pH of the batter.

As I poured my gooey batter into my lightly oiled cazuela, I admitted my doubts aloud. My remarks were answered with an eager request to lick the sides of “mixing bowl.” The largest spoon in the house was plopped into the mixing bowl and handed over.

The cake emerged from the oven golden on top with a wonderful crusty edge. It was moist and light with the subtle orange flavoring. The cazuela baked the cake evenly and a bit surprisingly, released the cake easily and in one piece. I cut two generous slices and served the cake with a cup of strong dark coffee. My slice wasn’t quite generous enough and as I rose to cut myself another piece, a bright voice asked for a second slice even though there was still half a slice remaining on the plate!


Blood Orange Olive Oil Cake
Makes one 10 inch round cake or one 12-cup bundt cake

2 ¼ cup flour
1 tsp baking soda
1 tsp salt
1 cup sugar
2 tbsp blood orange zest and lemon zest
2/3 cup blood orange juice (roughly 3 oranges)
3 eggs, beaten
8 oz olive oil
1 cup yogurt

Preheat oven to 350 degrees F. Lightly oil the baking round. I used a 12-cup capacity baking dish. The recipe is styled for a 12-cup bundt pan or equivalent round cake pan.

In a large mixing bowl, mix together flour, baking soda, and salt.

Zest one blood orange and half a lemon. Juice three blood oranges. In a second mixing bowl, mix citrus zest and sugar. Whisk in three beaten eggs, olive oil, orange juice, and yogurt.

Pour wet ingredients into the flour mixture. The mixture will look a bit curdled but it will be fine. Gently whisk until combined. Transfer batter to the prepared baking dish. Bake for 1 hour to 1 hour 15 minutes or until a toothpick inserted into the center of the cake comes out clean.

Bake 1 hour to 1 hour 15 minutes.

Note: my baking time may vary from the standard metal baking dishes. Clay cazuelas generally take longer to heat up and probably take a bit longer when baking. I advise checking the cake at the 45-minute mark.