Monday, March 29, 2010

Grown-up Mac and Cheese


Dear Michelle,

I did not intend to share this recipe, mostly because we've been sharing a lot of pasta dishes lately. So I didn't measure, I didn't write anything down, and I didn't photograph the process. I cooked the way I used to before we started sharing, and therefore caring about replication: by feel.

Jeff and I are not known for our culinary self-control. We are getting married in about two months (!), and therefore should be eating healthy and all that. I've said repeatedly in the past few weeks, "No more cheesy things! we need to eat healthy food! after this (pizza, or grilled cheese, or cake), we will eat fresh vegetables every night!" But then, it was cold out, we had been working on not-fun stuff all day, and have had several busy weekends recently, so when I exclaimed that I wished we could just have mac and cheese for dinner, Jeff volunteered to brave the elements and go to the cheese shop.

The Bedford Cheese Shop, that is. That place is one of my favorite shops in New York; if you live in the city, like cheese, and haven't been there, go directly. They are (mostly) very knowledgeable, not just about the taste of the cheese but about the food and wine to pair with it. For example, Jeff went in and told them we were making macaroni and cheese, wanted a cheddar, something soft and melty, and something with depth. He came home with a delicious English cheddar, sharp and nutty; a fontina, rich and creamy with a round flavor like swiss; and a sheep's cheese, hard, salty and irresistable.


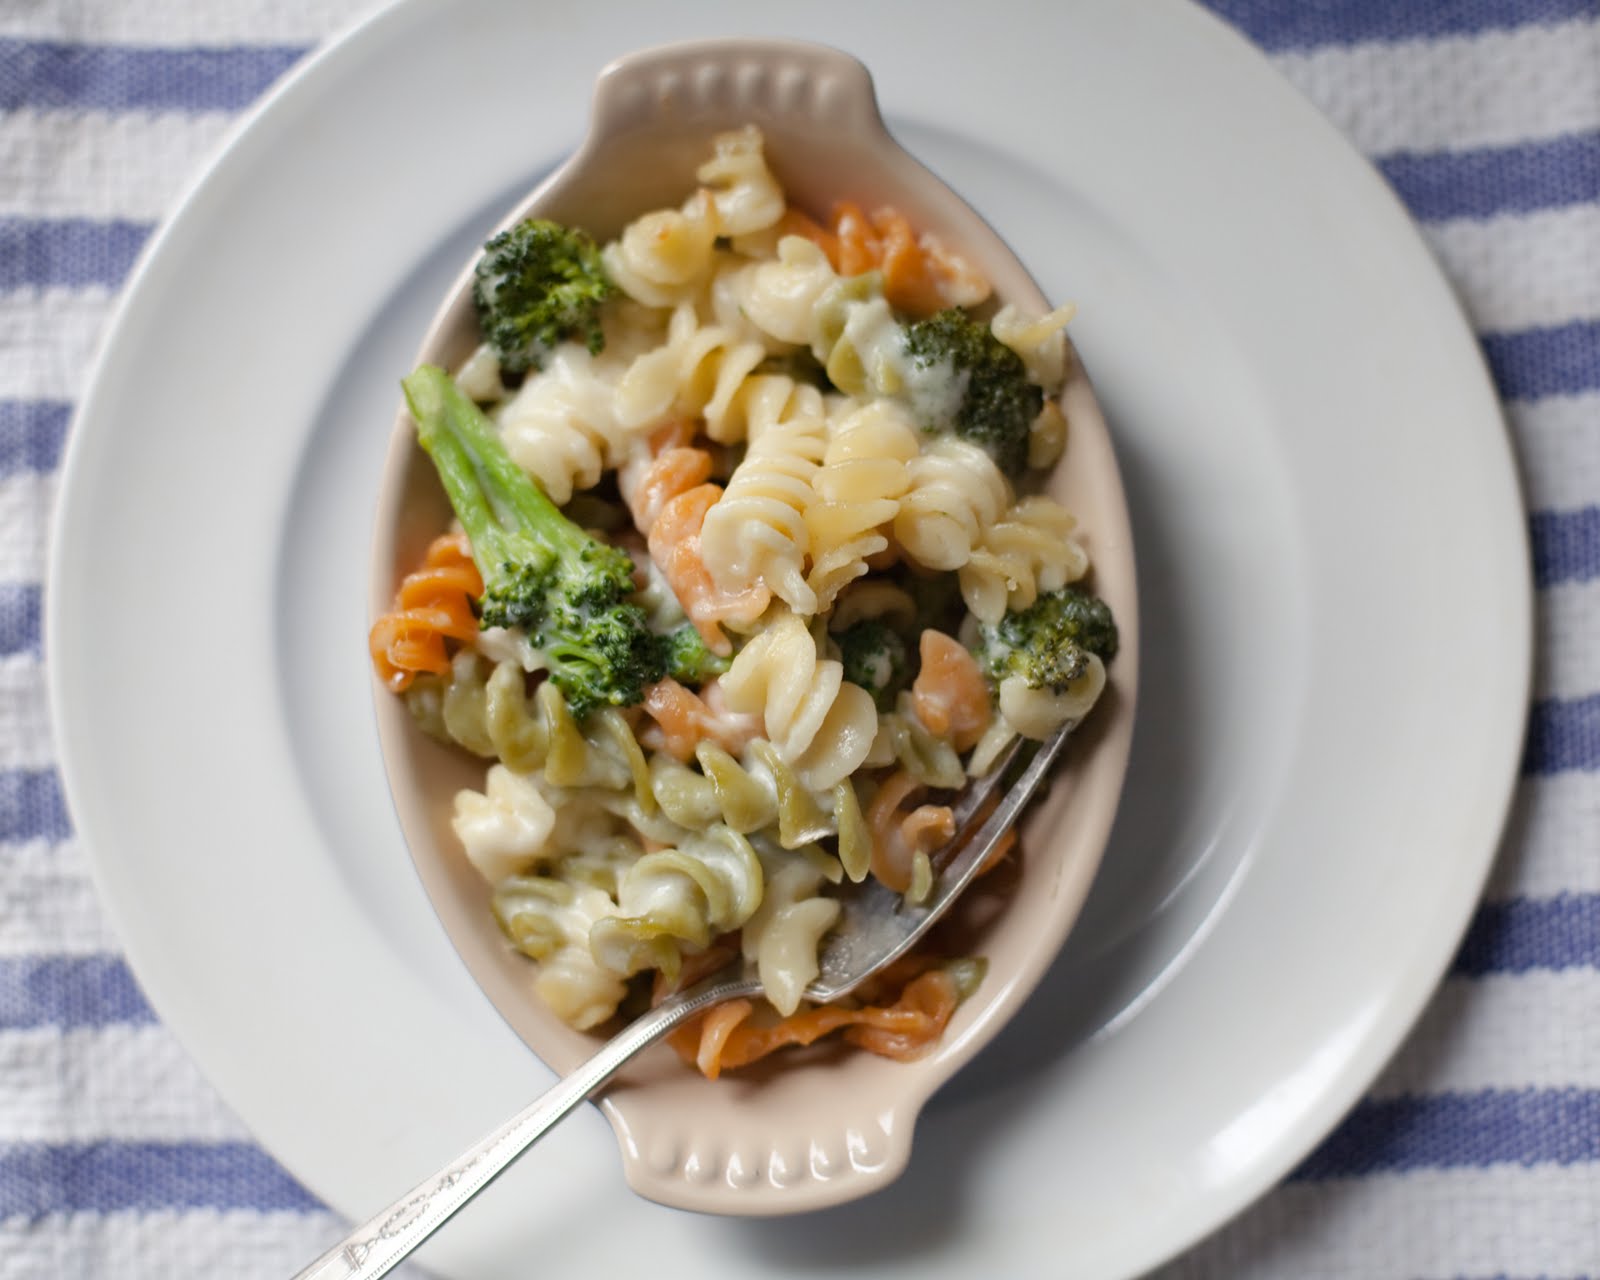
We had a box of tri-color rotini in the cupboard, which I chose for the color and touch of additional flavor. While that was cooking, I steamed some broccoli, and started a bechamel sauce. Once the broccoli is semi-cooked, and pasta just short of al-dente, it all gets mixed up with the cheesy bechamel and some reserved chunks of cheese, then the whole thing gets dumped into a gratin dish and baked until heated, melty, and a little crisp on top. The resulting dish is so creamy and cheesy, but not stringy or rubbery. The pasta is tender, and the broccoli adds a nicely contrasting texture and flavor. I'd recommend eating this with a salad lightly dressed with a mustard vinaigrette.

I think it is the best mac and cheese I've ever had, and I wish I'd taken a photo of it, just-baked, for you. As it is, I've settled for photographing the leftovers I'm about to enjoy. And, tonight, we'll have some fresh vegetables. Maybe.


Mac and Cheese. Well, Rotini and Cheese.

Note: you could use one kind of cheese here; having three just makes it extra-special. If you want a stronger garlic flavor, throw the garlic halves into the bechamel while it is thickening, then remove before combining everything.

1 lb pasta (something small, preferably something that will really hold a sauce well)
about 3/4 lb cheese, 1/4 lb each chedder, sheep, and fontina (go for the best here; it makes all the difference)
about 3-4T butter
about 1/4 c flour
about 2 c whole milk
two heads of broccoli, about 4 inches in diameter each, chopped into smallish florets (about an inch long by 1/4 -1/2 inch wide. Should be small enough to eat with a bite of pasta) and peeled lengths of stems
1-2 cloves garlic
1 7x10" or 9x9" gratin dish.


Start a large pot of water boiling for the pasta. Go hang out for a little bit.

If you haven't already, cut up the broccoli into florets. Start this steaming, and get a large bowl of cold, cold water ready. After just a couple of minutes, start testing the broccoli; you don't want it quite done, but barely tender enough that you can push a knife into it with a little effort. Once done, plunge into cold or iced water and leave.

Preheat oven to 350F.

Cook pasta till not-quite al-dente, then drain and rinse under cold water.

Grate 2/3 each cheese, keeping separated. Crumble or chop what's left into small chunks (no larger than a 1/4 inch/). Get out and measure milk, butter, and flour. Rub gratin dish with halved garlic slices.

Melt butter in saucepan or skillet over medium-low heat. Add large handful of flour, and stir with whisk until it smells very slightly toasted, but has not turned color. Add milk slowly, whisking the entire time. Once thickened (it will take about 5 minutes), add the grated hard cheese in handfuls, whisking to combine fully in between handfuls. Do the same with the cheddar, and lastly with the fontina. If sauce gets too thick, add another 1/4 c milk, whisking in slowly. Once all of the grated cheese is combined and sauce is smooth, add 2/3 of the chunks of cheese. Add to pasta along with broccoli, then put all in gratin dish. Sprinkle the rest of the cheese on top. Put in oven till cheese is melted, and pasta looks a little bit crunchy on top, 20-30 minutes. Heats up well, but is not quite as good the next day.

Sunday, March 28, 2010

Fish Soup


Dear Devon,

For the past few years, I have been making a simple fish soup. It's not a recipe I read about or learned from anyone, but a dish that I threw together on a whim one wintry night. It was so successful that I've repeated it many times. Over the years, I've played around with the recipe, creating two versions. One is tomato-based, infused with garlic and spiced with red pepper flakes and parsley. The second is made from a more classic vegetable stock of carrots and onions or leeks, and flavored with dill. A fillet of firm fish is nestled into the hot stock and slowly poached until flaky.


Herbs bring a sensation of freshness to any dish. In the winter, I stock up on dill and parsley, in part to remind myself that snow melts and warm sunny days will return. Aside from flat leaf parsley, dill is one of my all time favorite herbs. I love its strong distinctive flavor and bold green color. I mix a handful into salads, eggs, soups, and beans. A friend of mine told me that his mom often added dill to her soups. I was shocked I hadn't thought of it and quickly incorporated this flavoring technique into my cooking. Numerous bowls of soup later, my boyfriend has requested a hiatus from dill.


A light stock is essential. Otherwise, you will lose the flavor and texture of the fish, and perhaps overpower the dill. I begin with onions, garlic, and carrot sauteed in olive oil. I don't want to brown the veggies too much. I use both chicken broth and water. You can use all water, if you prefer, but I like the heartiness of the chicken broth. It gives the soup a bit more substance. I advise against using only chicken broth, as it creates an overly salty soup and disturbs the flavor.

There's nothing quite like sitting down to a nice bowl of warm soup. As my glasses steam up, I'm struck by the bright fragrance of dill. The fish is moist and easily flakes against the sharp tines of my fork. A piece of hand-torn day old bread quickly soaks up any remaining juice, melting into a soft delicious mush.


Fish Soup

1 large Tilapia filet, roughly 1 lb
1 yellow pepper, sliced
2 cloves garlic
1/2 small onion, chopping
2 carrots, diced
2 scallions, chopped
1/2 cup, chopped dill
1/4 cup, chopped parsley
1 1/2 cup chicken broth
1 cup water

Prepare vegetables in roughly equal size pieces. Heat a large Dutch oven over medium high heat. Gently saute yellow pepper, onion, carrots, and garlic in olive oil until onions become translucent. Pour in chicken stock, water, and a bit of salt. Cover and let simmer over medium low heat until the carrots are tender, about 15 minutes. Cut the fish fillet into large chunks. Add to hot soup and poach until just cooked through, 8 - 10 minutes. Toss in fresh herbs and scallions. Cook for 2 minutes. Taste for salt. Ladle into large bowls and serve with crusty bread.

Thursday, March 25, 2010

Jeff's Pasta with Sausage-Tomato-Pepper Sauce


Dear Michelle,

I think Spring might be my favorite time of year. All of the seasons have their upsides, though I imagine the recent warm weather is only reason I can say that of Winter right now. While Winter does mean cashmere and boots, fires and stews, it is easily my least favorite season. So I am thrilled by the first day that I open the windows because it is too warm in the house, and I can feel the outside air and hear the birds in the backyard. Spring brings with it the promise of sandals and skirts, and fresh, fresh, plentiful produce.

With the returning warmth, my appetite always starts to change. I begin to crave salads again, and other lighter fare, but the occasional cold day sends me back to the comfort food of Winter. Jeff made this warm, rich pasta dish for dinner on such an evening, and we ate it curled up on the couch while watching a movie.

For many years after we'd moved in together, it was understood that I'd be cooking dinner. This wasn't something we decided, but rather one of those things that just ends up that way. Then, slowly he started to cook more and more. He started off with the simple things, like hot dogs, then graduated to fried perogies with caramelized onion and fresh chopped tomato, and then one night he surprised me with this truly incredible spicy pasta sauce. I'd called to tell him to take care of dinner, as I was going to be home late, and I showed up to Jeff hovering over a pot of spaghetti sauce, which tasted AMAZING. He'd roasted hot Italian peppers, then combined them with sauteed onion, garlic, canned tomatoes, olive oil and butter, some herbs de Provence, and a dash of vinegar to pick it all up.


In this version of the sauce, Jeff first pan-cooks some sausage. He has a particular method for this, which he claims is the best; the links are pan fried, whole, until they brown, then split down the middle with a spatula and flipped to cook and crisp the inside. Once cooked through and browned sufficiently, the sausage is pulled from the pan and chopped. While that is cooling, the onions and garlic cook in the sausage fat, then everything else is added and the whole thing simmers for a while. The resulting sauce is perfect. It is rich with sausage, tangy and sweet from tomatoes and vinegar, spicy from the peppers, and softened by the butter. He usually tries to save a little extra for me, since I like to oven-cook eggs in the leftovers the next day.


I don't know what Jeff will master next, but I'm looking forward to it.


Spicy Tomato, Pepper, and Sausage Pasta Sauce

I'd bet that this will work with almost all pastas but angel hair and tiny pastas like orzo. We've had it with spagetti, fettuccini, orrechiette, and penne, and also used it as pizza sauce before. If you do not use sausage, saute the onion in several tablespoons of olive oil. Fresh basil is a great addition in the summer, as are rosemary, thyme, and oregano or marjoram. If you use a sweet pepper instead of a hot one, add some pepper flakes or hot sauce (Jeff uses Sriracha) for a kick.


about 1lb garlic sausage
1 sweet or hot pepper, deseeded
1/2 large or one small onion, diced (Jeff used a Vadalia for sweetness)
1 large can whole, peeled tomatoes (look for those with lower sodium), liquid reserved
1-2 cloves garlic, minced
2 T butter
Sherry vinegar to taste
pepper
herbes de Provence
grated hard cheese as desired
about 1/2 lb pasta


Drizzle pepper with olive oil on baking sheet, and sprinkle with herbes de Provence and salt. Roast at 400F until very soft, or even till slightly browned.

Start a large pot of water boiling for the pasta, adding salt once it does.

Place sausages in pan over medium-high heat, and let cook till browned. Split open with a spatula (they may have started to split on their own), then turn upside down to cook the inside. Remove once crispy and cooked through; let cool and then chop. Reduce heat to medium-low, remove all but about 2 T of fat from pan, and add onions, stirring occasionally. Once onions start to become transluscent, add garlic and cook a few minutes longer. Open tomatoes. Pull out and squeeze to break up with your hands (I love this part!), directly into the pan. They tend to squirt tomato juice, so beware. Add half of tomato juice from tomato can, reserving the rest. Add vinegar, starting with about 1 T and adding additional to taste.


Adjust heat to maintain a steady simmer. Chop and add pepper, and hot sauce or pepper flakes if necessary. Add herbes de Provence. Add sausage back in. Simmer for at least a half hour, adding reserved tomato juice as necessary, starting the pasta cooking at the appropriate time. Take off of heat, stir in butter, and then drained pasta. Sprinkle with cheese if desired.


Monday, March 22, 2010

Linzertorte

Salut Devon,

I recently spent a lovely afternoon playing piano duets and baking with my lady friend, Gunhild. We had a great time, both at the keyboard and in the kitchen. She has one of those amazing apartments filled with sentimental objects: faded prints, colorful rugs, dusty books printed in German Gothic type, and best of all, a grand piano and a harpsichord. Her apartment is in a beautiful part of upper Manhattan near Fort Tryon Park. Happy squeals from the children in the nearby playground drift through the open window as our linzertorte quietly bakes.


I had tasted Gunhild's linzertorte many times and always found it delicious. I figured the recipe was in her Austrian blood. So, you can imagine my surprise when I saw that the recipe came from an old edition of the Joy of Cooking! My astonishment was even greater when she handed me a gleaming copper bowl and a wooden spoon. Gunhild came of age before the electric mixer was widespread. If generations of bakers managed to make linzertortes without it, I suppose I could, too, at least for one afternoon. I did loudly object when she instructed me to beat the butter for an hour. This was seriously hard work. Even with soft butter, the process is slow and tedious. Adding flour, chopped nuts, and eggs only increased the effort. As the process wore on, I could feel the burn in my shoulder and the kink in my neck. All I can say is: I love my electric mixer.

With our linzertorte batter cooling in the freezer, I took a much needed rest with a restorative cup of tea. Freezing really helped to bring the batter together. The room temperature butter had gotten a bit too soft and greasy. 20 minutes or so later, we pulled it from the freezer and began building the torte. The 9-inch round springform pan was brought out and filled with 3/4 of the batter. Next came a thick, dark, luscious layer of raspberry jam. Use good jam (and butter) for this recipe. It definitely makes a difference. In lieu of piping the decorative lattice on top, Gunhild dipped her fingers into a nearby bowl of flour and rolled out skinny coils of dough. After the fuss I made over the electric mixer, I think she was a bit self-conscious about her latticework, insisting that she needed a piping bag. But I disagree: I love the rustic, uneven look of the hand-formed lattice. The linzertorte went into the hot oven and we headed over to the piano.


With the pleasant afternoon and the delectable linzertorte lingered in my thoughts, I decided to try it on my own with an electric mixer. Though I had faithfully copied her recipe, I consulted my edition of the Joy of Cooking. To my surprise, the recipes are different. For better or worse, I'm not sure. But I take comfort in her well-worn recipe. A few substitutions were made. Hazelnuts for almonds, and the flavor of jam. Raspberry jam was low, so I combined it with a blackberry variety from my favorite Italian grocery store at the Chelsea Markets. Good jam is one of my must haves. I don't eat jam a lot, but when I do, I want it to taste like fresh fruit. Some jams tend to be more sugar than fruit, making them excessively sticky and a bit tart. In place of the springform pan, I pulled out a 13 inch rectangular tart pan that I've been dying to use.
The resulting torte can only be described in my dear friend Fatima's recent email:

I thoroughly thoroughly thoroughly loved that torte! It tasted like a cross between a pecan shortbread and sour cherry pie -- DELICIOUS! I can't even say I like linzertortes -- I pass them by every time I see them, but that one was so buttery, nutty, semi-tart, goodness...it was a gem of a treat, THANKS.


Linzertorte
3/4 cup butter, softened
1 cup sugar
2 eggs
1 tsp lemon zest
1 cup hazelnuts
1 1/4 cup flour, sifted
1/4 tsp cloves
1/2 tsp cinnamon
8 oz raspberry jam

Preheat oven to 350 degrees F.

Roast hazelnuts on a large baking sheet until fragrant. Using a large dishtowel, rub off the skins while the nuts are hot. Grind in a food processor. Set aside until ready to use.

Beat together sugar and butter until smooth. Beat in eggs, lemon zest, and ground hazelnuts. Sift flour, cloves, and cinnamon. Using a rubber spatula, fold in dry ingredients. Cool in the freezer for 20-30 minutes.

Let the dough come to room temperature. Spoon 3/4 of the batter into baking pan. Using an offset spatula or the back of a spoon, smooth out the batter into a smooth layer. Evenly, spread jam over the batter. With lightly floured fingers, roll remaining batter into long coils. Carefully arrange half the coils about 1 1/2 inches apart on the tart. Place the remaining coils on top at right angles to the already placed coils, forming a lattice pattern.

Bake until lattice is golden brown. 9 inch springform bakes for 50 minutes. 13 inch rectangular give 40-45 minutes.


I use the leftover batter to make butter cookies. Roll the remaining dough into small balls and place on a lined cookie sheet. Bake at 350 degrees for 10 - 12 minutes until light golden brown.

Saturday, March 20, 2010

Gateau Breton


Dearest Michelle,

I love, love, love The Country Cooking of France. For weeks after you gave it to me, I've been itching to sit down and read it through, but had been thwarted by life until this week. Finally, a couple of days ago, I was able to deposit myself on the couch with a cup of tea and minimal procrastinatory guilt to read it cover to cover. It is a gorgeous book, one of those that would be equally appropriate on a coffee table or on a bookshelf devoted to serious cookbooks. The photos are lovely, and the blurbs about different regions and ingredients make entertaining reading. And then, there are so many recipes in there that I want to make! I was bookmarking those that I liked particularly, but that soon became redundant.

A few recipes jumped out at me immediately, among them that for gateau Breton. I was waffling between baking that or a lemon tart (a long-time favorite), but the gateau was a little easier to make, and required fewer ingredients. There is no image to go with the recipe in the book, but the description grabbed me,

"A cross between pound cake and shortbread, Gateau Breton seems to me richer and more luscious than either."

Who could resist that? I'm sure glad I didn't; this is something I will make again. It is buttery like a shortbread, but rich with the egg yolks and therefore more tender to the bite, with barely a touch of crunch in the top due to the glaze. Eaten immediately (and, no, we didn't wait till it had cooled completely, though you are supposed to), it seems a touch sweet, but the next day the flavors were perfectly balanced. Supposedly, it gets even better with age, and can be kept for up to two weeks, but this one barely made it three days. Someday I'd like to see how the flavors further develop. Maybe the trick is to hide it somewhere.


While this gateau is perfect on its own, I couldn't help but think of pairings for it. I ate it for breakfast yesterday with strawberry jam (delicious) and a cup of maccha green tea, and I bet it would be equally as good with lemon curd. One of my friends suggested incorporating almond paste, which would also be tasty. Almond flour, substituted in for some of the all-purpose, would be interesting too. Mostly, I'd like to use this dough as tart crust, which it's not far from. I don't know that I'll mess with the gateau itself, as much as incorporate the recipe into something new; any additions would make it other than what it is, so perfect in its purity.


Gateau Breton

from The Country Cooking of France by Anne Willan, pg 293

Note: This is incredibly easy to make, and well worth it. I loved how the book has the weight of ingredients marked; if you don't have a kitchen scale I'd highly recommend getting one. It takes all of the guesswork out of measuring flour. That is, of course, if the recipe notes the weight. I imagine that the butter, egg yolks, and sugar could be mixed most of the way in a separate bowl for ease and incorporated with the flour afterward, but I made it in the method detailed below which was not difficult. The author notes that if you do not use salted butter, 1/2 t salt should be added to the flour.


1 c /225g salted butter, soft but not VERY soft
6 egg yolks, room temp, beaten to mix but not beyond
2 c / 250 g flour
1 c / 200g sugar
1 T Calvados or rum ( optional- I omitted due to convenience)

8 inch tart pan with fluted rim and removable base


Butter tart pan ( I use a brush, which is easy and consistent) and set aside 1 t egg yolk for the glaze. Sift flour onto work surface and sweep a large well in the surface with your hand (larger than you'd think). Cube butter and add to center with sugar, yolks, and booze, if using. Work these together with fingers into a paste. Using fingers and heels of your hands, work in flour and work dough gently 'til smooth. It should be sticky at this point and should be mixed with the use of a pastry scraper.


Transfer dough to the pan and smooth the top with your hand, dipped in water so it does not stick. Brush the surface with the reserved egg yolk and mark a lattice in the glaze with the tines of a fork. Chill until firm, at least 20 m. Meanwhile, heat oven to 375F/ 190C.

Put tart pan on baking sheet before setting in oven. Bake 20 m. Reduce heat to 350F/180C and bake until cake is firm and golden brown, and the edges shrink from the sides of the pan, 20-25m longer. Let cool till tepid, then free it from the pan to a rack to finish cooling. Sprinkle with powdered sugar if you are so inclined.

It's as good freshly baked as it is saved in an airtight container for up to 2 weeks, when the texture softens and the butter flavor deepens.

Tuesday, March 16, 2010

Baked Ziti

Dear Devon,

A few nights ago, my good friend and neighborhood buddy came over for a first look at the new place. I had the day off and decided to prepare what I thought would be an easy meal of baked ziti. But minutes before she arrived, I found myself standing over a steamy sink frantically scrubbing at tomato-sauce-encrusted pots. Tessa isn't the type of person to stand on ceremony. She came over in her after work clothes (something I fully support), but with a six-foot ladder standing in my living room and the tricky oven, a devastated kitchen was hardly how I wanted to greet her. Needless to say, our night was filled with gossip, hearty laughter, and of course, yummy food. Tessa was a particularly good sport, taking a large container of baked ziti home with her.

Cook's Illustrated is my favorite food publication. Its appearance in my mailbox draws my wide smile and excited giggle. Though I read the magazine cover to cover, I seldom cook any of the recipes. Perhaps after reading their extremely thorough discussion and how-to, I no longer feel the need to make the dish. With this magazine I am a passive observer, a culinary couch potato. But given how methodical the writers are, I assumed the recipes would be essentially foolproof. It was with this thought that I attempted their "baked ziti" recipe from issue 97 (March & April 2009).

The recipe seemed harmless enough. It asks for some unorthodox methods like substituting cottage cheese for ricotta, half cooking the ziti pasta, and making both a cream sauce and a tomato based sauce. Written out, there were only five steps. I had made baked zitis many times before, always with good results and minimal effort. How hard could this recipe be? Technically, the recipe was simple, but in terms of work, it was overload. The recipe should have come with a warning label: Do not attempt without 1) electric or manual dishwasher (meaning not you) 2) a mile of counter space 3) a dozen wooden stirring spoons and half as many pots, mixing bowls, or any large bowl shaped containers.

Attempting to make this in a New York sized kitchen is an absolute joke. My favorite instruction read: Off heat, stir in...Translation: move to the only empty burner not used in the last 10 minutes because every inch of counter space and table tops are occupied. While the results were pretty fantastic, I don't think my baked ziti in the past was that bad.

Though I found serious faults with the recipe, I do plan to use some of their suggestions. For instance, I like the substitution of cottage cheese for ricotta cheese. I liked seeing the large curds between the layers of pasta. In addition, using cottage cheese avoided that gluey texture of loose ricotta in baked pasta dishes, lasagna included. The use of two sauces was also a nice touch. The cream helped to subdue the sourness of the tomato. However, making separate sauces is a bit too much work. In the future, I'll add a bit of cream to the tomato sauce instead. I also liked their suggestion for half cooking the pasta. The idea is to allow the pasta to fully cook once incorporated with the sauce in the oven. The Cook's Illustrated recipe asks for diced mozzarella to be mixed in with the pasta. I forgot to add this extra cheese, but it didn't affect the taste and I'm not sure I will use it next time either.

Right off the bat, I made some significant changes to the recipe, and a few substitutions: I added spinach and mushrooms, and swapped flour for cornstarch, and 1% milk for cream. I forgot to buy both diced canned tomatoes and mozzarella, so I omitted them. I also reduced the amount of grated parmesan cheese.

I won't deny that the dish turned out well. True to the article's promise, it was highly flavorful and moist. The pasta was not overcooked, and it plumped up beautifully. But was it really worth all that effort? I'm not so sure. My plan is to try it again, keeping some of their ideas, but editing down the labor that went into this one.

Baked Ziti
from Cook's Illustrated March-April 2009
(paraphrasing the recipe with my added comments)

1 pound whole milk cottage cheese
2 large eggs, lightly beaten
1/2 cup grated parmesan cheese (the recipe asks for 1 1/2 cups)
1 pound ziti
5 medium garlic cloves, smashed
1-28 oz can tomato sauce
1-14.5 oz can diced tomatoes (omit, if as in my case, you forget to buy this)
1 tbsp sugar
3/4 tsp flour (recipe asks for cornstarch)
1 cup milk (recipe asks for cream)
8 oz shredded mozzarella
1 box frozen spinach, defrosted and squeezed of excess water
8 oz mushroom, sliced

Preheat oven to 350 degrees. Butter 9 x 13 casserole dish.

Whisk cottage cheese, eggs, and parmesan cheese in a medium bowl. Mix in defrosted spinach and mushrooms. Set aside. In a Dutch oven, bring water to boil. Add in pasta and salt. When the pasta begins to soften, drain and set aside.

In another pot, heat oil and garlic over medium heat until fragrant. Stir in tomato sauce and sugar and simmer. (Note: cover the pot, or suffer the volcanic eruptions of thickening sauce.) Cook until thickened, about 10 minutes.

Stir cornstarch/flour into milk/heavy cream until dissolved. Transfer mixture to now empty Dutch oven and set over medium heat. Bring to a simmer and cook until thickened, 3 to 4 minutes. Off the heat, add ricotta mixture and 1 cup tomato sauce. Stir to combine. Add half cooked pasta. Stir to combine.

Pour pasta mixture into prepared pan. Spread remaining tomato sauce evenly over the pasta. Sprinkle with shredded mozzarella cheese. Cover baking dish with foil and bake for 30 minutes. Remove foil and continue baking for 20 minutes, until the cheese is bubbling and nicely browned.

Friday, March 12, 2010

Cream Cheese and Pecan Cookies


Dear Michelle,

I am a big fan of Martha Stewart. That woman really has it together. Even when she got arrested, it wasn't your run of the mill celebrity law trouble- no DUI, no drugs, no spousal abuse; she was simply too together and ahead of the game, albeit in an illegal way. And then she went to jail! Practically unheard of! And no, Paris Hilton being in jail for, like, 5 hours doesn't count. Plus she can't make a cookie like Martha, nor I imagine do anything like the Queen of DIY can. Or really do anything useful at all.

But I digress- on to the cookies. Like so many happy culinary accidents, these cookies were discovered due to necessity. That is, the necessity of needing cookies and having walnuts and wanting to make cookies that involved them. I told Jeff that if he could find a good recipe online and we had everything necessary in the pantry, I'd make some cookies. That promise is always a good way to get things done around here.

Now, Jeff has a little bit of history with the Martha Stewart test kitchen, as he worked there for a little while during his temp days. He has some funny stories about Martha, and many good memories of tastings and getting sent home with food, a nice break from bachelor-eating. So when he found these on her website, I knew they'd be good. They looked, and were, pretty easy to make, and another plus is that one recipe makes several "logs" of cookies; I will bake one or two and leave the rest in the freezer. That is heaven for those days when you really want something sweet and buttery, but don't want to get everything out to make them, and measure and clean, or if you are having people over and need something easy and quick. They are perfect with tea (and I'd imagine with coffee too), and great for a pre-breakfast morning snack. Yes, I just said that. And I do not feel shame!

These have made so many fans in the short time I've been making them. A friend's husband has waxed poetic, my parents (and I) put a good dent in the holiday batches I made, and so many people have asked me for the recipe. I'm sure I'll return to my favorite cookies (oatmeal-chocolate-walnut-cranberry) at some point, but for now I cannot get enough of these.

They are basically a butter cookie, dressed up fancy, and with many variations. Cream cheese adds a little tartness and an unexpected flavor, while the rock salt and nuts add a savory note and keep the cookies from being too sweet. That, to me, is the key to a really good cookie, the kind you just can't stop eating; it can't be too sweet. I will often add some citrus as well, because it always goes so well with nuts, and of course with butter and sugar. While Martha rolls the logs of dough in finely chopped nuts, I like to use nuts mixed with a little more salt and raw sugar. I also prefer the cookies to be smaller, about 1- 1.5 inches each instead of 2-3 inches.

Cream Cheese and Pecan Cookies

Original recipe from the Martha Stewart website. Some changes have been made.

Notes:

I used mostly cake flour (500g), as I was out of all-purpose, and it worked just fine.
Make sure to use coarse salt! they will be way too salty otherwise. If you only have regular salt, I bet the correct measurement would be about 1/2 t. However, the crunchy salt is part of what makes these really good!

Martha calls for 6 oz cream cheese. Most packages come as 8oz, and I've forgotten that enough to know that it doesn't make that big of a difference in this recipe. Made with 6 oz instead, they are not quite as tart, and just a touch more tender. I also just realized that, this time, I only used half the butter! They are still good, but will of course be better as the recipe reads, so unless you are on a diet I'd not recommend skimping. I'd wondered why they weren't quite as tender! Also, sometimes I don't toast the nuts. It's a matter of preference, but I think they toast enough while baking. There was a note on the M.S. website that someone had tried these with macadamia nuts to great success.

4 c (500g) all-purpose flour
1 1/4 t coarse salt
2 c butter, softened
6-8 oz cream cheese
1 1/4 c sugar
3 T vanilla extract
3 c walnut or pecan halves, 2 c (toasted or not) broken, 1 c finely chopped
(zest of 1 citrus fruit)
1/2-1 c raw sugar
1t coarse salt (taste dough- if very salty, forgo this. If not enough, add a bit more here)


Whisk flour with salt. Cream butter together with cream cheese. This is easiest with an electric mixer of some sort; you want to mix it until light and fluffy, hard to do unless you're stronger than I.


Add sugar and cream again till light and fluffy- you'll notice when it starts to take on a different texture. Mix in vanilla. Add flour, and mix until just combined (sometimes I do this by hand). Mix in broken walnuts (2 c).


Rip approx. five one-ft lengths of wax paper or saran wrap. Scoop dough into rough logs about 1-1/2 inches in diameter- roll to smooth out. I find that using a silicon baking liner on the outside of the wax paper or saran wrap works really well for this. Freeze, or refrigerate for at least a half hour.


If frozen, let sit out for a few minutes to thaw the outside somewhat. Preheat oven to 350. Mix finely chopped nuts, raw sugar, and salt. Roll dough in this mixture, and cut every 1/3 of an inch. Lay out on silicone liner or parchment paper on baking sheets, spaced about 1 inch apart. Bake until golden around the edges, 15-20 m. Cool before eating: they're good right away, but the best flavor is achieved after they are fully cool. I like to put the leftover nut-sugar-salt mixture in the freezer with the saved cookie dough, for whenever I decide to make the remaining portions.

Taunt fiancee and friend with cookies that cannot be eaten till photographed. Enjoy!